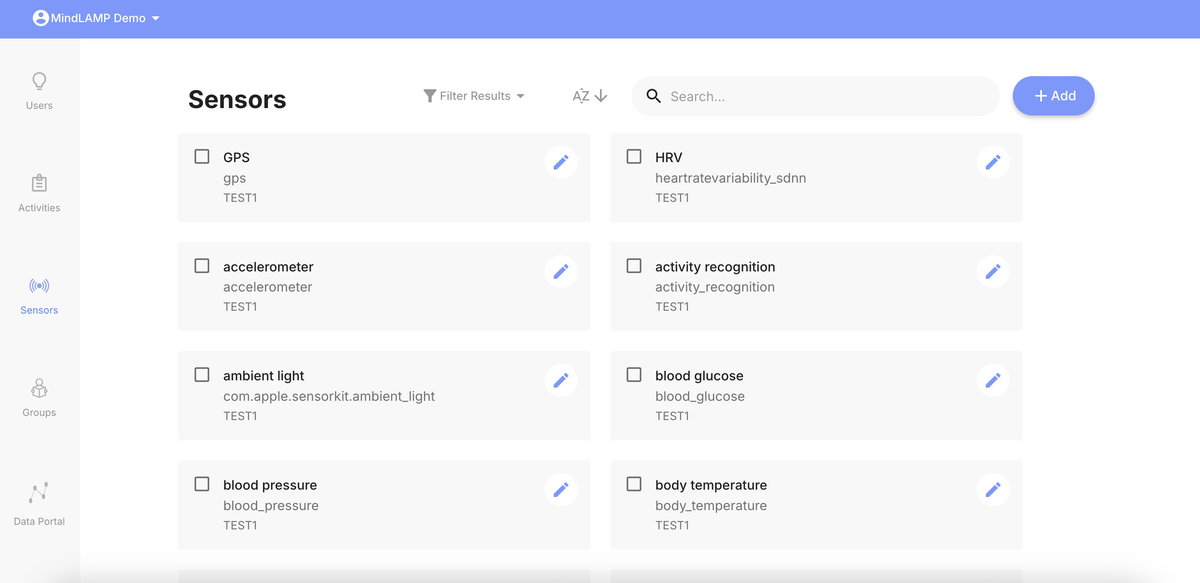
Sensors Tab
The Sensors tab allows researchers and clinicians to configure which passive sensors are active for their study groups.
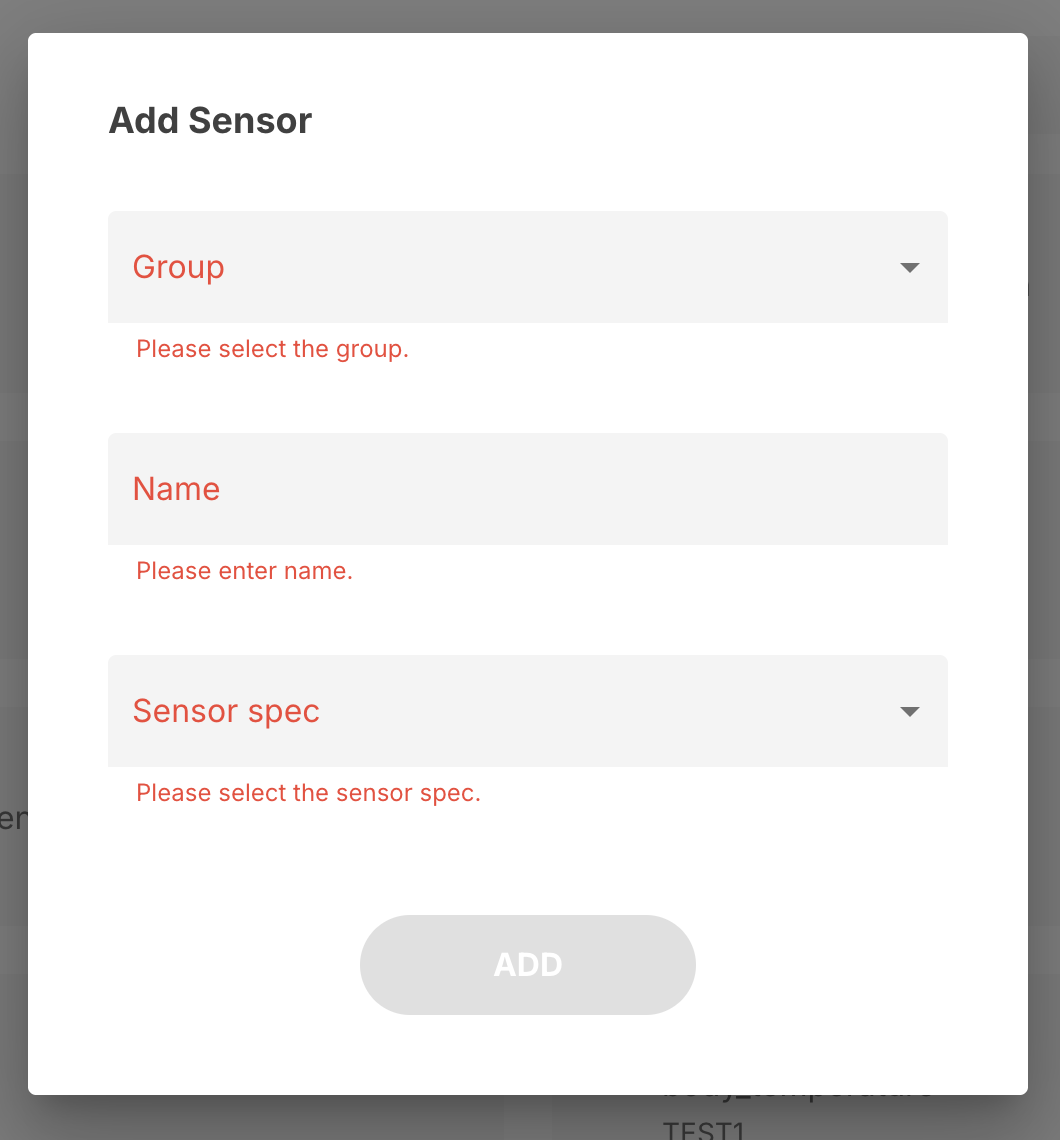
Adding a Sensor
- Navigate to the Sensors tab.
- Click the blue + Add button.
- Select the group you want to add the sensor to.
- Name your sensor (e.g., "GPS", "Accelerometer").
- Select the sensor spec from the dropdown (e.g.,
lamp.gps,lamp.accelerometer). - Click Add to save.
The Sensor spec dropdown lists all available sensor types:
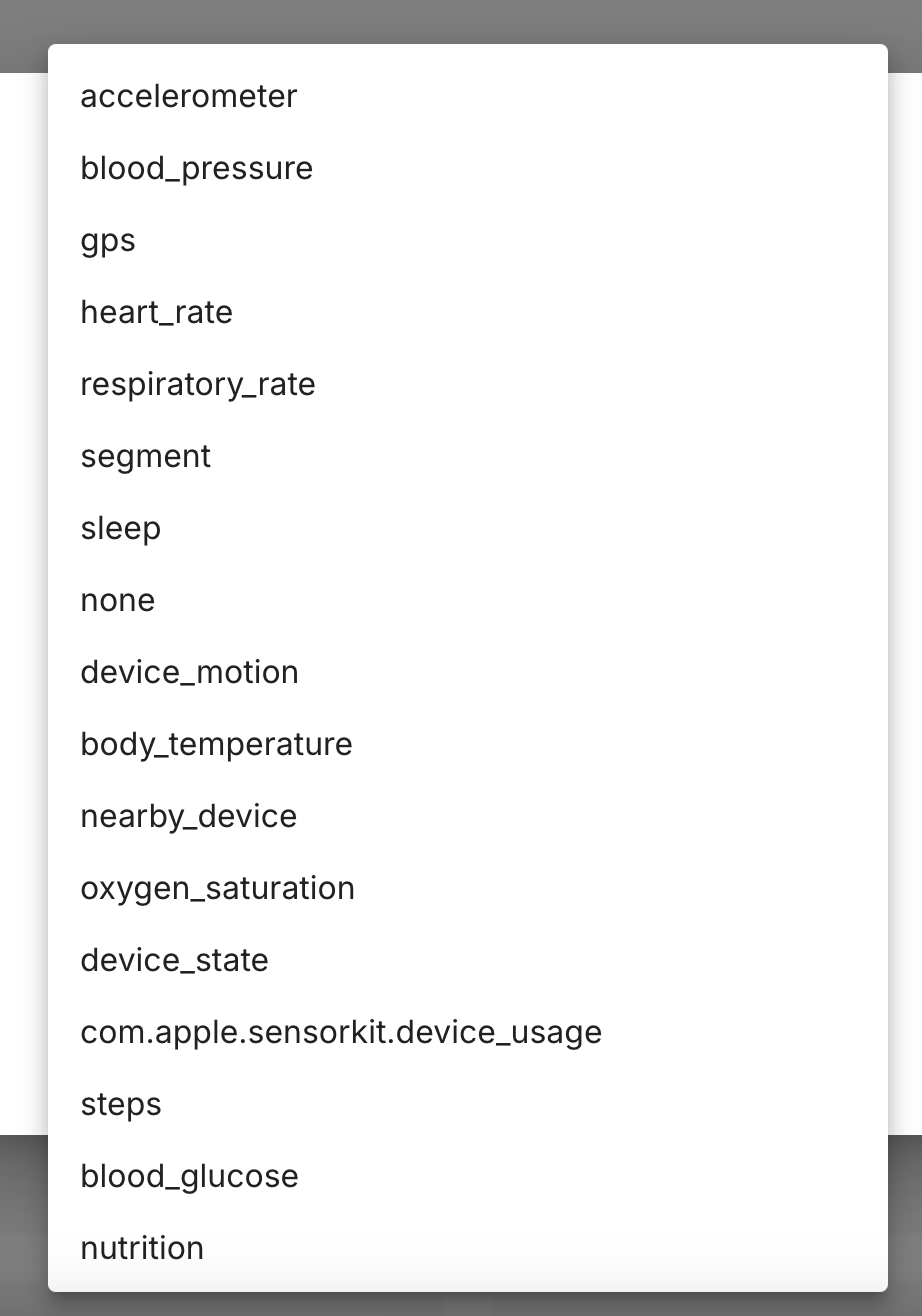
Available Sensors
Sensors added through this tab correspond to the device sensors and health data types available on participants' devices. See Sensors & Passive Data for the complete list of available sensor specs and their data fields.
Sensor List
Each sensor entry shows:
- Name — The display name you assigned.
- Group — Which group the sensor belongs to.
Sampling Rates
Sampling rates (how frequently a sensor collects data) are configurable but are set through the API rather than the dashboard UI. See Sensor Configuration for default rates, maximum values, and guidance on balancing sampling frequency with battery impact.
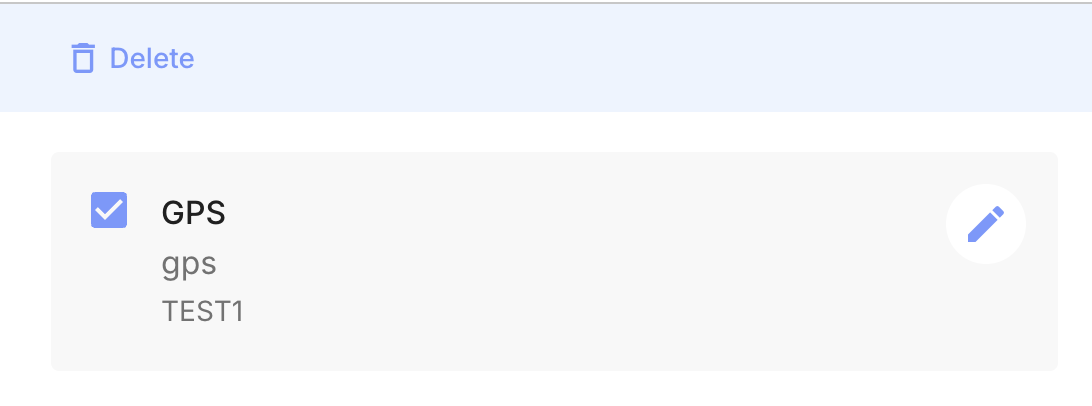
Deleting a Sensor
Select a sensor by checking its box to reveal the Delete action. This stops data collection for that sensor type across the group. Previously collected data is not deleted.